Succulent Terrarium Tutorial

[This terrarium how-to was originally written a for the C&B Daily blog. Clover and Bee was a fantastic wedding website dedicated to the Midwest, and is sadly defunct. I have reposted the tutorial here.] Succulent terrariums

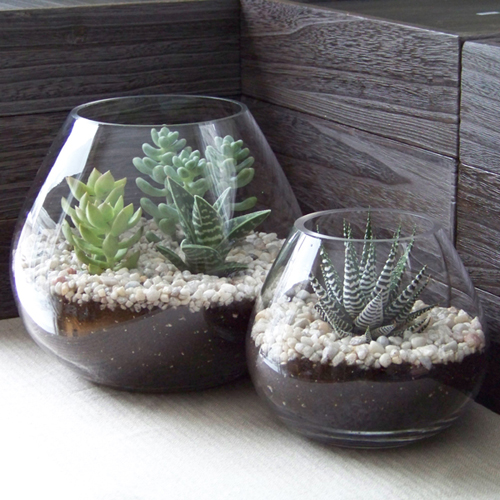
Terrariums are a great gardening project to shake those Midwest winter blues. A terrarium could add the finishing touch to your coffee table, some low-maintenance greenery to your desk, or would even make sweet centerpieces for your wedding!

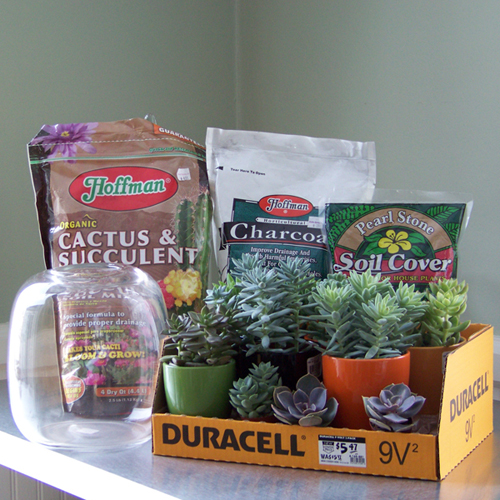
Here’s what you’ll need:

A clear glass vase – open containers work well for succulents Decorative pebbles, pea gravel, or aquarium rocks Horticultural charcoal Cactus & Succulent soil mix Succulents A spoon

materials for a succulent terrarium

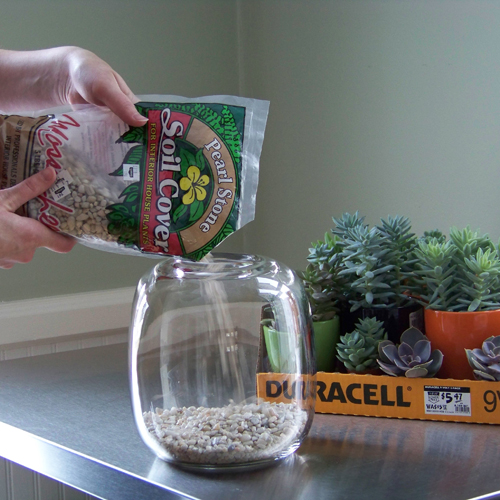
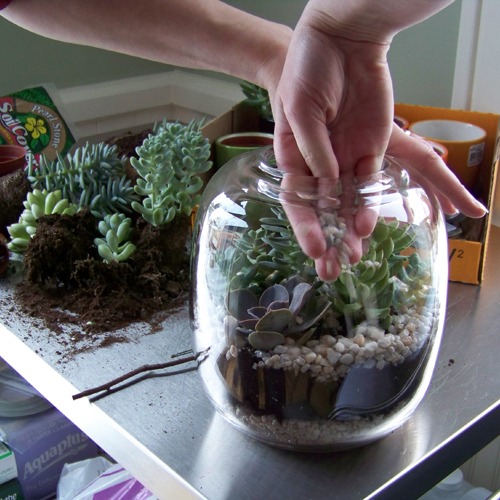
Start with a clean vase. Add a layer of pebbles about an inch thick and smooth the layer out. This layer provides drainage so the plant roots won’t rot in water.

use stones to create a drainage layer for your terrarium

Then add a half inch of horticultural charcoal. The charcoal will help keep the terrarium smelling fresh. Smooth out this layer too. (I found that it helped to rinse the charcoal before I used it to prevent a layer of black dust from collecting on the inside of the vase.)

add horticultural charcoal to keep your terrarium smelling fresh

Next add an inch or two of cactus & succulent soil mix. You want the soil to be dry so it doesn’t stick to the sides of the vase while you work.

add cactus and succulent soil mix

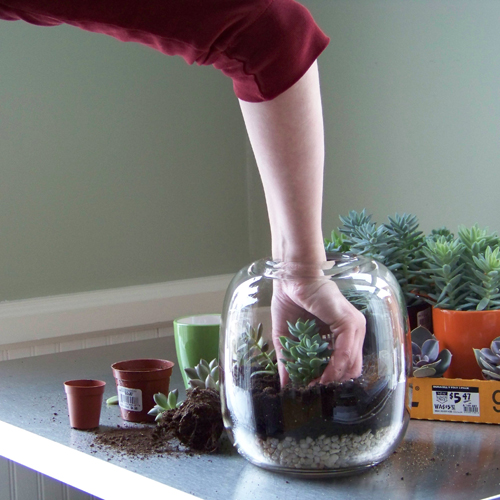
Using the spoon, scoop out a hole for your first plant. If you have multiple succulents in one pot, don’t be afraid to break them apart and use them separately. Make sure to inspect your plants for any diseased leaves and remove them before planting.

breaking apart succulents to use separately

Plant the succulent in the hole and then pack the soil firmly around the base of the plant. Repeat until your terrarium is full.

plant your succulents

plant your succulents

Smooth out the soil around the base of all the plants. Then give your terrarium a finished look by adding a thin layer of pebbles on top of the soil. This layer will prevent the soil from being disturbed when you water your terrarium.

finish the terrarium with another layer of stone

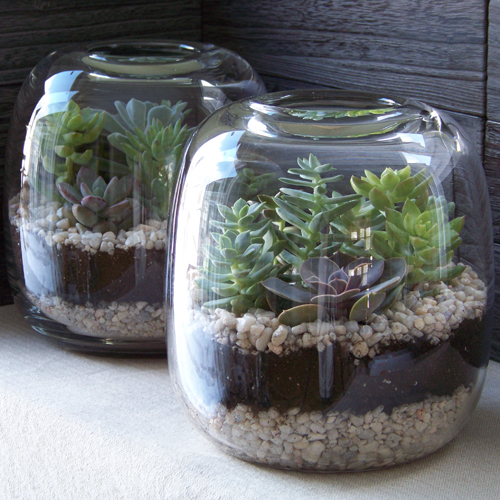
To maintain your terrarium, keep it in bright indirect light. The glass jar will amplify the effects of the sun and could end up baking your plants if you leave it in full sun!

finished terrarium

Remember, terrariums thrive on neglect. Water your terrarium every week with a shot glass or two of water. Make sure to err on the side of under watering. The last thing you want to do is drown your new succulents!

Enjoy!

succulent terrariums

Wheatgrass Centerpieces - Casual, Fun, and Easy to Make

wheatgrass centerpiece with gerberas in a galvanized pot 
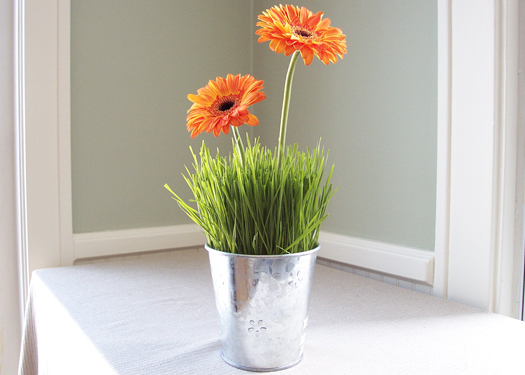
I mentioned wheat grass centerpieces in an earlier post about saving money on centerpieces. I've noticed a lot of people searching for more information, so I thought I would share my experience with growing wheatgrass to you.

This centerpiece is fun and casual and would work for a summer wedding or event. For a spring twist on this centerpiece you could replace the gerberas with tulips.

Here is a list of items that you will need to grow this centerpiece yourself. First go to Ikea and buy some cute containers for a great price. Miracle Gro potting soil is a must - the fertilizers in the soil make a huge difference in the lushness of the grass. I bought my wheatgrass seeds from wheatgrasskits.com. I bought the fifty pound bag, but ten pounds should be enough for twenty-five small centerpieces like the one I've shown. I also bought a bottle of Mold Control from wheatgrasskits.com. Wheatgrass is prone to mold, so you have to take a few preventative measures. Finally, you need florist's water tubes, floral preservative, and gerbera daisies to complete the look.

I soaked my seeds in water and the Mold Control prior to planting for six hours. Wheatgrasskits.com recommends soaking them for no longer than 8 hours to prevent mold growth. Mix the Mold Control into the water before soaking the seeds, taking special care to use the concentration suggested on the bottle.

While the seeds are soaking, fill your containers with the Miracle Gro potting soil until the soil level was two inches from the top of the container. This two inch allowance hides the lower sheath of the grasses – which is a thin and unsightly portion of the grass.

Then make sure the soil in the containers is damp, and ready to receive the seeds. Be sure not to water-log the soil, or you may end up growing mold. If there are no holes at the bottom of your container, then this will be a concern during the entire growing process.

After soaking the seeds, make sure to rinse them well. Mold Control residue will inhibit the germination of the seeds. Now you are ready to cover the soil with a layer of seeds. Once the seeds are down, place the pots out of reach of children and pets. Water from beneath every two to three days and watch your seeds grow. Ideal growing conditions are 70 degrees Fahrenheit with bright indirect sunlight. I grew mine indoors next to a large North-facing window.

It only takes me one week to grow lush centerpieces during summer, but I would recommend leaving yourself at ten days if you are trying to grow wheatgrass in the middle of winter. If the grass is too tall you can carefully trim it with scissors a couple of days before your event. But if it is too short there is not much you can do.

The day before the event you can finish off the look by adding the gerbera daisies. Start by mixing the floral preservative into water. Make sure to follow the instructions on the packets exactly, so that the concentration is correct. Then fill the water tubes with the water and insert one gerbera into each tube. Finally, stick the tip of the water tube down through the layer of seeds into the soil.

Now your centerpieces are ready to go. Make sure to wipe any water or soil off the bottom of the pot before placing it on the table.